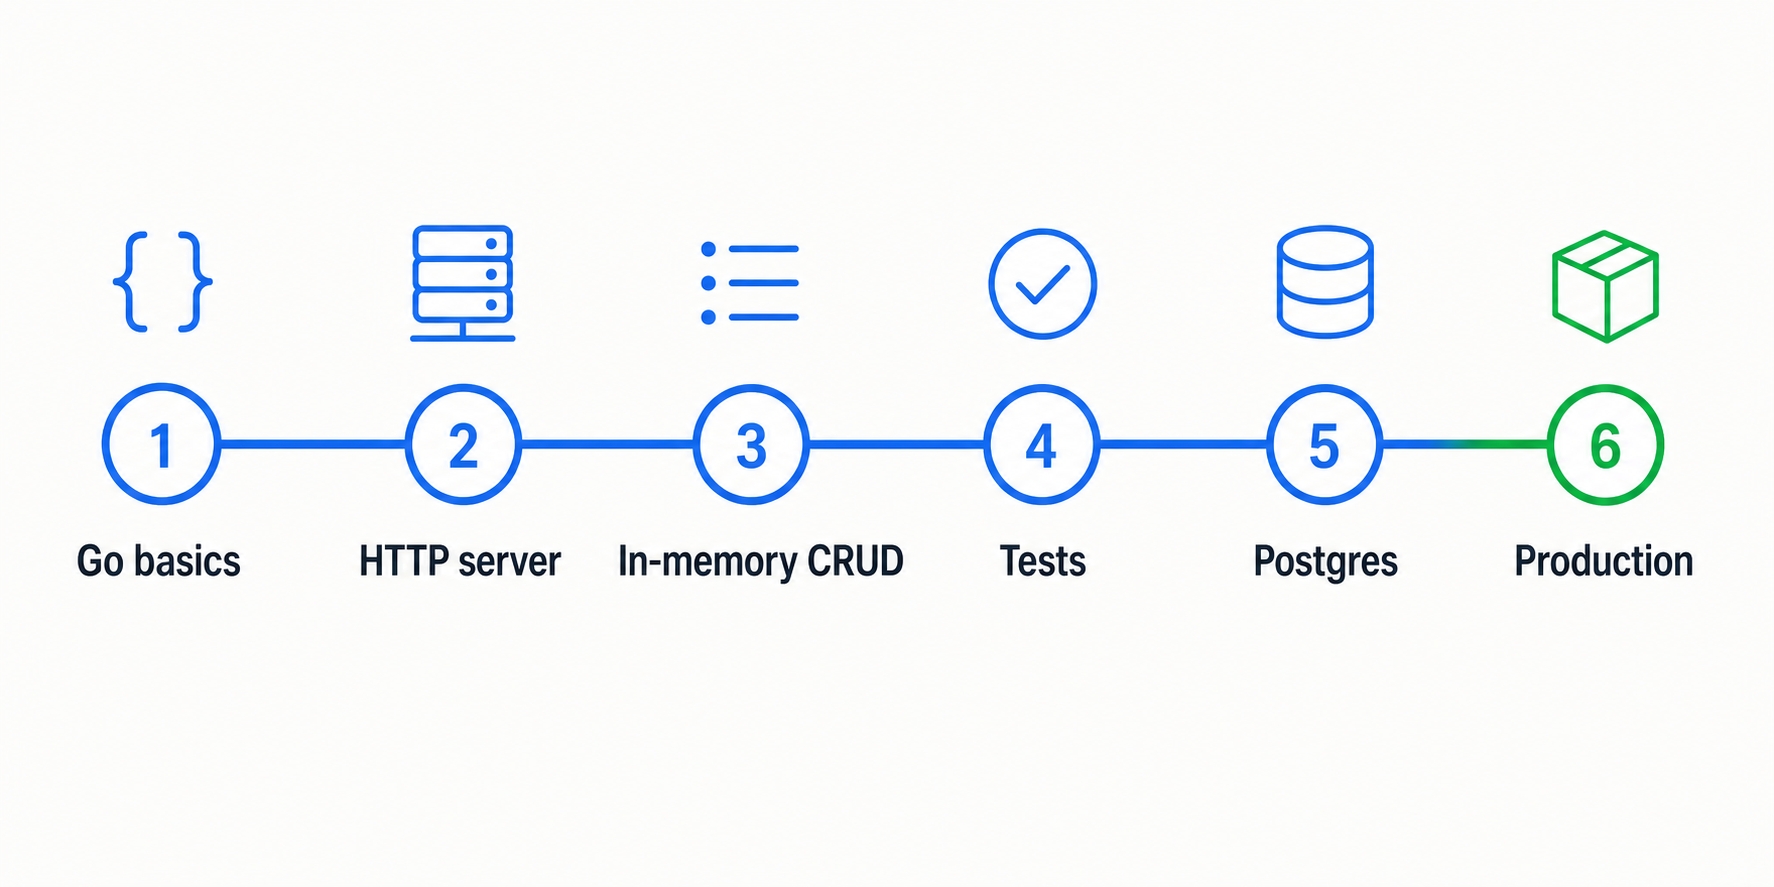
The last two chapters covered Go in the abstract; now we look at the actual software you are going to build. The whole course points toward one project: a Task API, a small web service for managing a to-do list over HTTP.
There is no code to write here yet, just the shape of what is coming.
A Task API is a backend service that stores tasks. It lets other programs create, read, update, and delete those tasks over the network. There is no website or screen attached to it. It speaks JSON (a plain-text format for sending data) over HTTP (the protocol the web runs on). Because of this, anything that can make an HTTP request can use it. That might be a web app, a mobile app, a command-line tool, or you poking at it with curl.
A single task is simple. It has a title, an optional description, and a flag for whether it is done. That is the entire domain. We keep it small on purpose. The interesting part of this course is never "what does a task mean," but rather "how do you build a service properly in Go."
A to-do app is the classic beginner project. For backend work, that reputation is earned. Here is what makes it a good teacher.
The domain gets out of your way. You already understand how a to-do list works, so no mental energy goes into figuring out the problem itself. All your focus goes into the code.
It exercises the full set of REST operations. REST is a common style for HTTP APIs. You act on resources (in this case, tasks) using a small set of HTTP verbs. A task naturally needs all of them. You need to create one, list them, fetch a specific one, change one, and remove one. By the time the API is finished, you will have used every verb you are likely to need in real work.
It also grows in exactly the directions a real service does. We start with tasks held in memory. Then we add validation, tests, a real database, and finally the production trimmings. Each step has an obvious reason to exist, so nothing feels like busywork. The arc from "it works on my laptop" to "it is ready to ship" is the exact same arc you will follow for most backend projects.
Here are the five endpoints the finished API exposes. Each pairs an HTTP verb with a path, and each returns a specific success status code. A status code is the three-digit number HTTP uses to report how a request went. Numbers in the range mean success. , , and are the three we use here.
2xx200 OK201 Created204 No Content| Method & path | Purpose | Success status |
|---|---|---|
POST /tasks | Create a new task | 201 Created |
GET /tasks | List all tasks | 200 OK |
GET /tasks/{id} | Get one task by its ID | 200 OK |
PUT /tasks/{id} | Update an existing task | 200 OK |
DELETE /tasks/{id} | Delete a task | 204 No Content |
There are a few things worth noticing here, because they will come back later.
The verb carries the intent. GET reads, POST creates, PUT replaces, and DELETE removes. The path names what you are acting on. The verb says what to do with it. This is the core idea of REST.
The {id} in three of the paths is a placeholder for a real task's ID, such as GET /tasks/42. Notice that the exact same path does a different thing depending on the verb used. Routing these requests to the right place is an important topic, so it gets its own chapter later.
The status codes are not interchangeable. Creating a task returns 201 to indicate something new exists. A successful read or update returns 200 to hand back the result. Deleting a task returns 204 to say the action worked, but there is no data to send back. Choosing the right status code is part of building an API that other developers can trust. We will be deliberate about it.
Every task the API stores and returns looks like this:
json{"id": 1,"title": "Write the first HTTP handler","description": "Return a JSON response from net/http","done": false,"createdAt": "2026-06-24T09:30:00Z"}
Here is what those fields mean:
true or false, indicating whether the task is finished. New tasks usually start as false.Notice that the server owns the id and createdAt fields, not the client. When you create a task, you do not send those values. The server fills them in and hands the complete task back to you. This keeps IDs unique and timestamps honest. It is a small design decision that pays off when we write the create endpoint.
To make the JSON concrete, here is what creating a task looks like from both sides.
You send a POST request to /tasks with just the fields you control:
json{"title": "Write the first HTTP handler","description": "Return a JSON response from net/http"}
The server stores the task and replies with a 201 Created status code. It also returns the full task, which now includes the id, the done flag defaulted to false, and the createdAt timestamp it generated:
json{"id": 1,"title": "Write the first HTTP handler","description": "Return a JSON response from net/http","done": false,"createdAt": "2026-06-24T09:30:00Z"}
That round trip of JSON in and JSON out is the heartbeat of the whole service. Every endpoint is just a variation on this pattern.
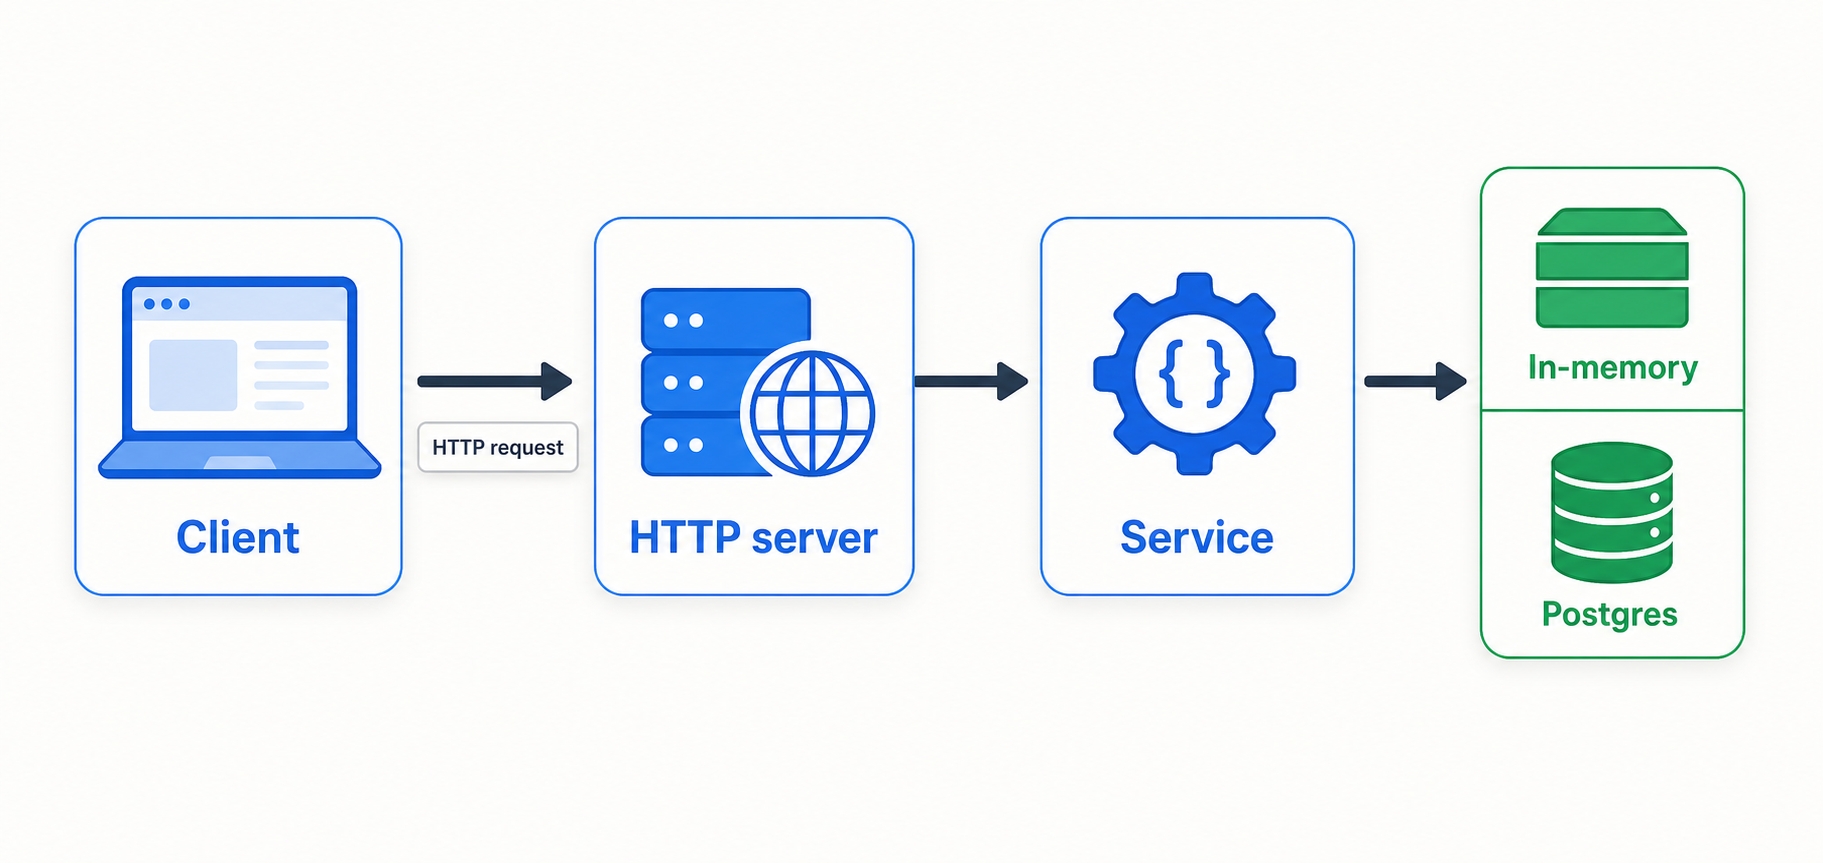
When a request arrives, it does not hit one giant block of code. It passes through a few clear layers, and each layer has one specific job. Keeping these layers separate is what makes the service easy to test and easy to change later.

Reading from left to right:
curl, a web browser, or a mobile app. It sends an HTTP request and waits for a response.The store layer is the one to watch. We begin with an in-memory store. This means tasks are held in a Go map that only exists while the program runs. If you restart the server, the tasks are gone. It is the simplest possible storage. Using it lets us focus on HTTP and JSON without a database getting in the way. Later, we replace it with PostgreSQL, a real relational database, so tasks survive server restarts.
Here is why this layering is worth the effort. The service and HTTP layers will not need to change when we swap out the store. They talk to the storage layer through a shared definition of what a store must do. Because of this, the in-memory version and the Postgres version are interchangeable. We will lean on this design more than once. It is one of the most useful concepts in the entire course.
We do not build all of this at once. The course adds one capability at a time, following the order a real project tends to grow.

You might have noticed we write tests before adding the database. That ordering is deliberate. It is much easier to learn testing against the simple in-memory version. Once those tests exist, they act as a safety net for the bigger database change that follows. Throughout the course, we build the service the way it is done in production, rather than as a toy that just happens to run.
That is enough planning. In the next chapter, we will install Go, set up your editor, and run your first program. This ensures your toolchain is completely ready before we write any of the API.