In the last chapter you got Go running and printed Hello, Go!. But you ran it by typing go run . by hand, and the only thing checking your code was the compiler. Before we write the rest of the course, we will set up two small tools that you will use in every chapter from here on: a Makefile to give your commands short names, and golangci-lint to catch common mistakes the compiler lets through.
This chapter adds no application code. We wrap the existing Hello, Go! program in tooling, so the habit is in place before there is much code to get wrong.
Why bother this early?
You will type the same handful of commands hundreds of times in this course: run the program, build it, format it, check it. Two problems show up fast. First, the exact commands are easy to forget and slightly different on every project. Second, the Go compiler is strict but not thorough. It refuses to build code with an unused variable, yet it happily compiles a program that ignores an error returned from a function. That ignored error is one of the most common bugs in Go, and nothing in the standard go build will warn you about it.
A Makefile fixes the first problem by putting your commands in one standard place with short names. A linter fixes the second by reading your code and flagging mistakes that compile fine but are probably wrong. Setting both up now means you learn good Go idioms as you go, instead of unlearning bad ones later.
What a Makefile is
make is a command-line tool that reads a file named Makefile and runs the commands you have defined in it. Each named command is called a target, and you run one with make <target>.
Think of it as named shortcuts. Instead of remembering go run ., you type . Instead of , you type . The names are short, they are the same on every machine, and a new contributor can open the and see every command the project supports in one glance. ships with macOS and Linux out of the box, so there is nothing to install.
The shape of each target is the same: a name, a colon, then on the next line the command to run. So make run runs go run ., make build runs go build, and so on. These map directly onto the toolchain commands from the previous chapter. The ./... you see on fmt and vet is Go's way of saying "every package in this module," which matters once the project grows past a single file.
The help target is the one exception. It is a small script that reads the Makefile and prints every target next to the comment after ##. You do not need to understand the grep/awk line; it is convenience sugar so that make help always lists what is available without you opening the file.
Two gotchas to know
Makefiles have two rules that trip up almost everyone the first time.
The first is tabs, not spaces. The command under each target must be indented with a real tab character, not spaces. This is the single most common Makefile error. If you indent with spaces, make stops with a confusing message like missing separator. Most editors insert spaces by default, so if you write a Makefile from scratch, make sure your editor uses a real tab inside the recipe. In the companion repo this is already correct, so checking out the branch sidesteps the problem entirely.
The second is .PHONY. By default make assumes a target's name is a file it should build, and it skips the target if a file with that name already exists and looks up to date. Our targets are commands, not files, so we list them under .PHONY to tell make "these are not files, always run them." Without it, the day you create a folder called build, make build would silently do nothing. The line at the top of the file handles this for every target.
Adding golangci-lint
A linter is a tool that reads your source code and reports likely mistakes and bad style, without running the program. The compiler answers "will this build?"; a linter answers "is this a good idea?"
Go has several linters, and running each one separately would be tedious. golangci-lint solves that: it is a single fast runner that bundles many linters together and runs them in one pass. You configure which ones you want, run it once, and get all their findings at once.
Install it with Homebrew on macOS:
brew install golangci-lint
bash
Confirm it is on your path:
golangci-lint version
bash
This course was built with golangci-lint 2.12.2. The version matters because golangci-lint changed its configuration format in version 2, and the config below uses the newer v2 format. If you install a much older version, the config file will not load.
The configuration file
golangci-lint reads its settings from a file named .golangci.yml in the project root. Here is ours:
# .golangci.yml
version:"2"
linters:
enable:
- errcheck
- govet
- ineffassign
- staticcheck
- unused
yaml
The version: "2" line tells golangci-lint to use the v2 config format, which is required by version 2 of the tool. Everything else lists the linters we want turned on. We keep the set small and beginner-friendly on purpose:
errcheck flags error return values you forgot to check. This is the big one for beginners.
govet runs the same suspicious-code checks as go vet, like a Printf format string that does not match its arguments.
ineffassign flags an assignment whose value is never used, which usually means you made a typo or forgot a line.
staticcheck is a large bundle of correctness and simplification checks, and the most valuable single linter in the set.
unused flags functions, variables, constants, and types that are never used anywhere.
Now wire it into the Makefile. We already did: make lint runs golangci-lint run, which reads .golangci.yml automatically.
Running it
With both files in place, run the linter on our Hello, Go! program:
make lint
bash
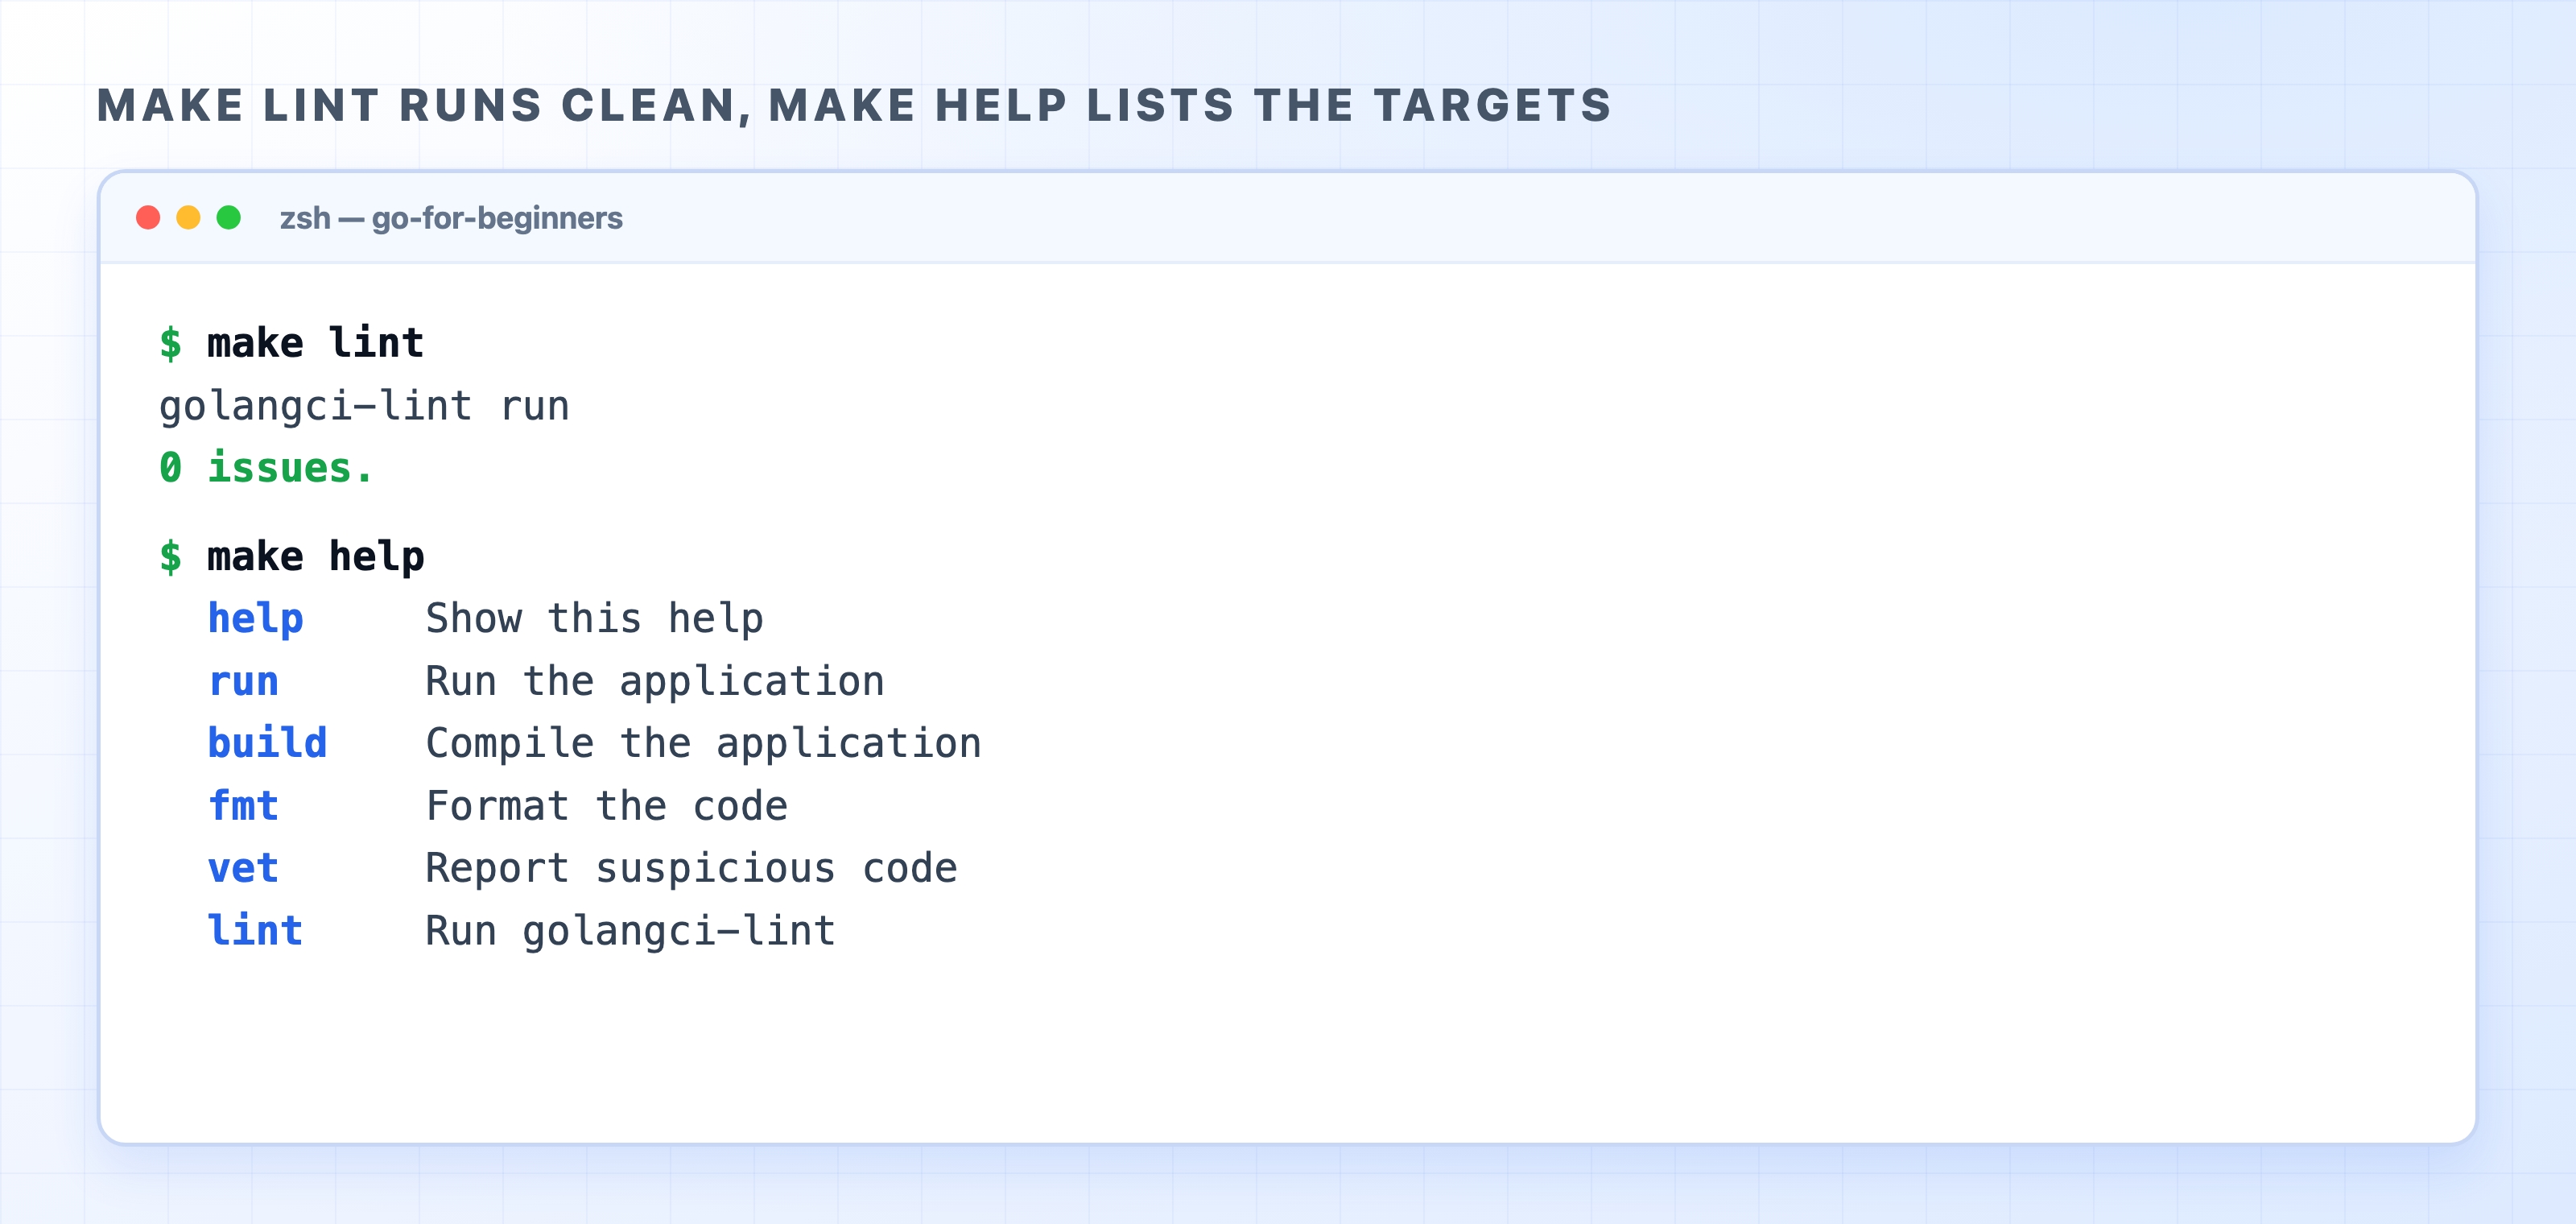
Because the program is tiny and correct, there is nothing to complain about. You can also run make help to see the targets you have available:
make lint runs clean and make help lists targets
0 issues. is the result you want, and make help confirms the six targets are wired up. The other targets are just as quiet on a clean project: make run prints Hello, Go!, and make fmt and make vet print nothing at all, because there is nothing to reformat and nothing suspicious to report. No output is the good outcome for those.
What a real finding looks like
A clean 0 issues. is reassuring, but it does not show you the point of the tool. So let us look at a finding from a broken-on-purpose program. The code below is not in our repo. It is a throwaway file written just to trigger the linter, so you can see what a finding reads like.
package main
import"os"
funcmain(){
os.Remove("missing.txt")
}
go
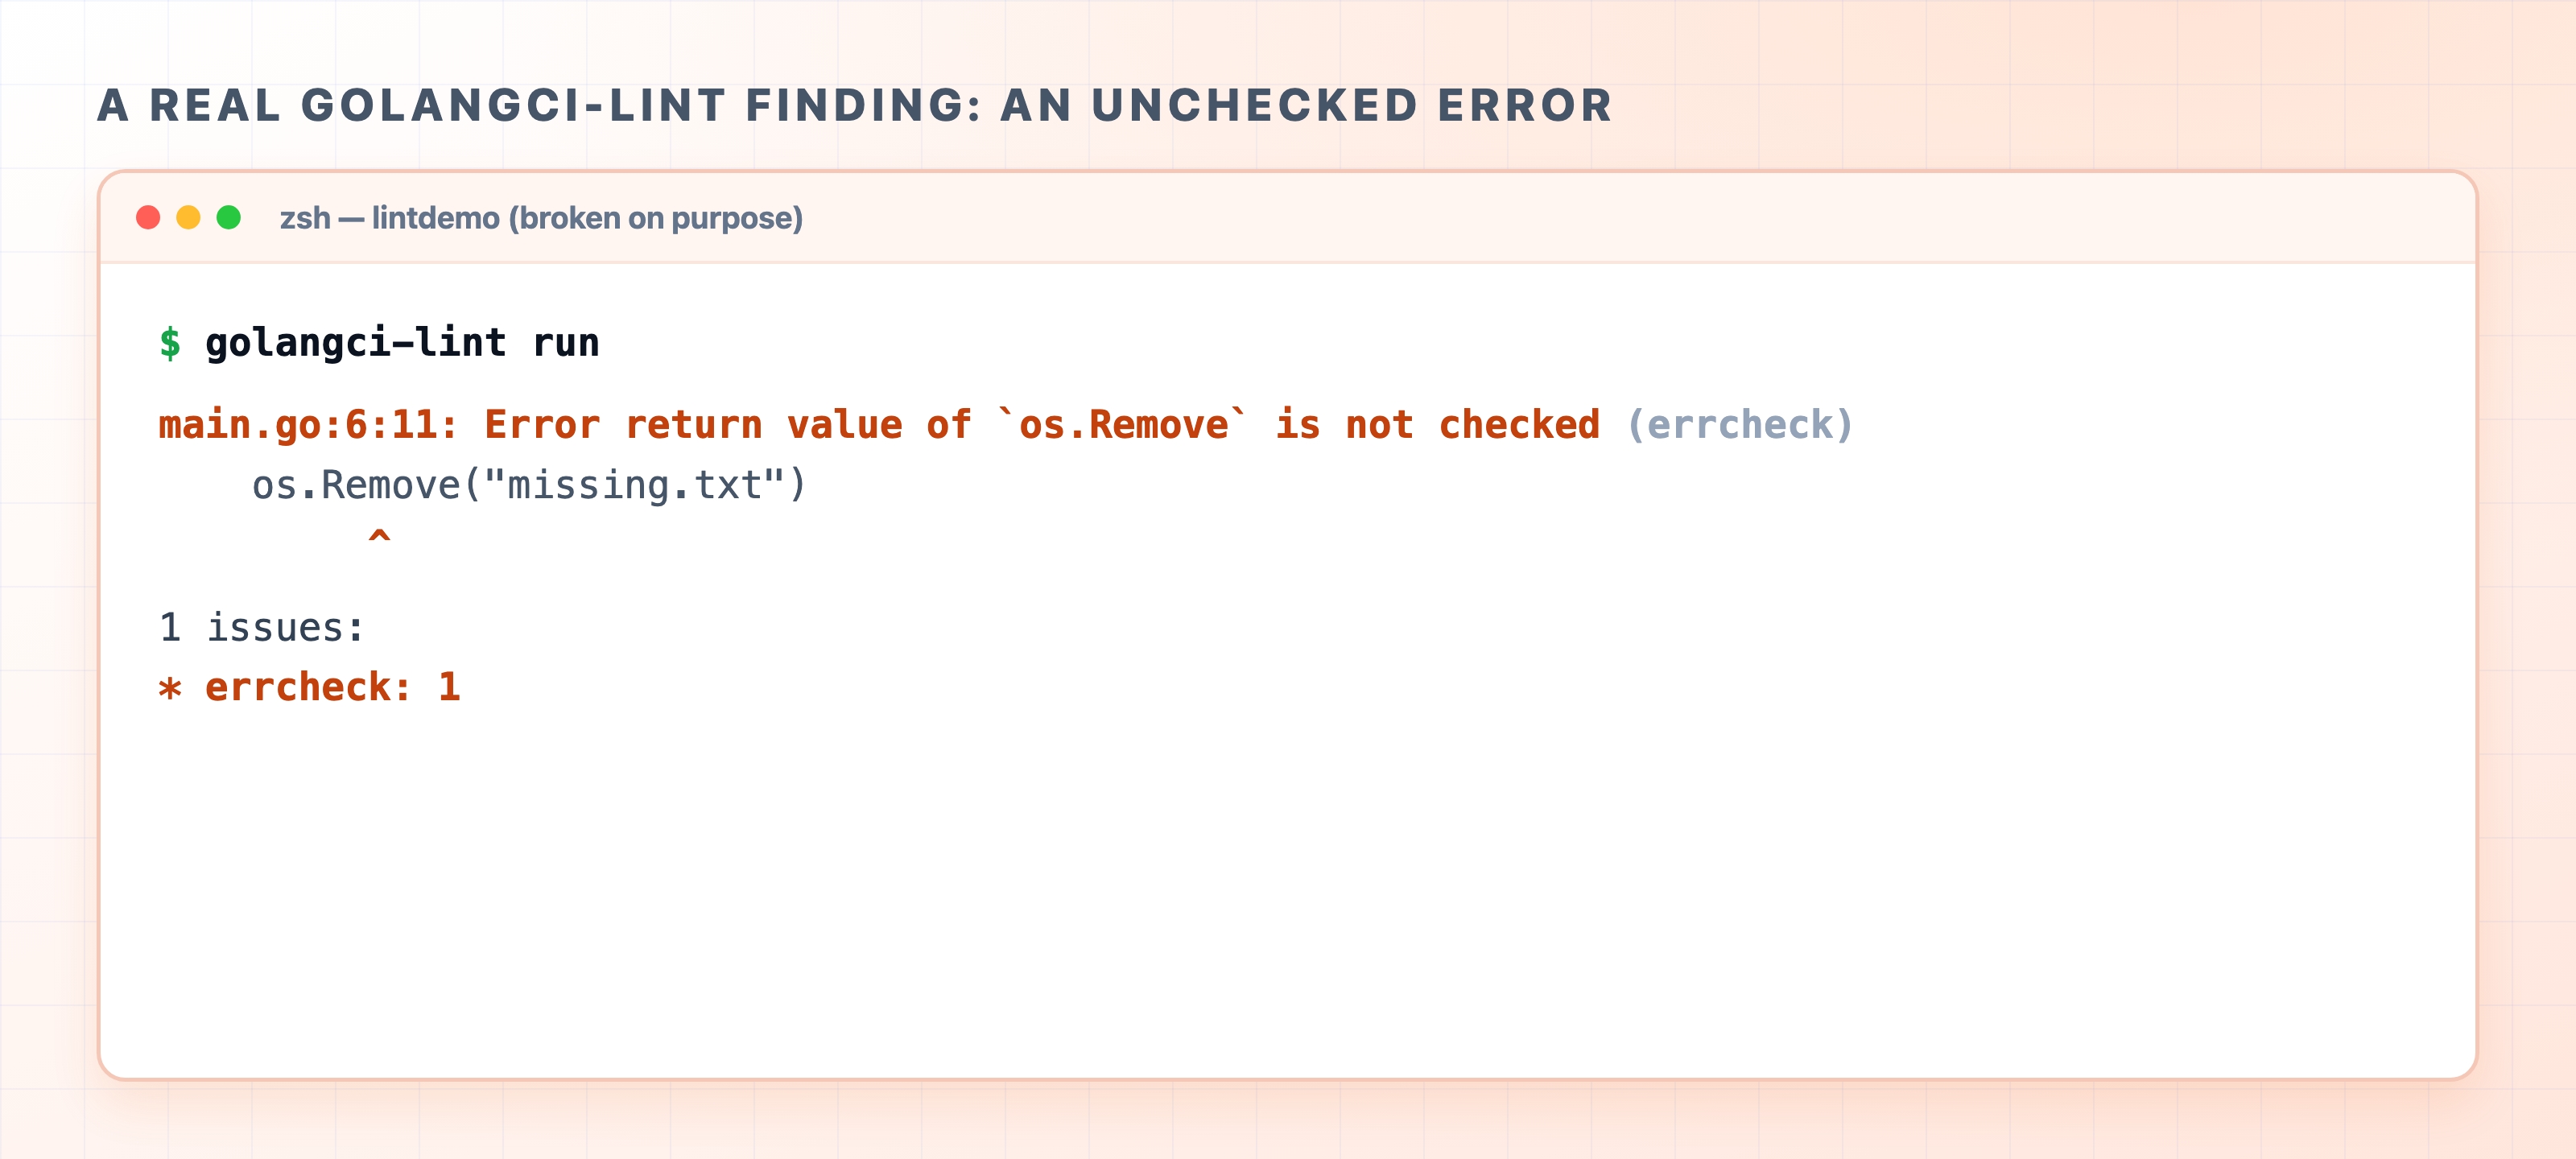
This program compiles and runs without complaint. os.Remove returns an error if the file cannot be deleted, but we never look at that error, so any failure is silently swallowed. The compiler does not care. errcheck does:
A real golangci-lint finding for an unchecked error
The finding points at the exact line and column, names the function whose error you dropped, and tags which linter caught it (errcheck). This is the whole value in one screen: code that builds and runs, but quietly ignores a failure, gets caught before it ever reaches a real system.
There is a second kind of mistake worth knowing because Go treats it differently. An unused local variable is not a lint warning at all, it is a hard compile error. Write x := 1 and never use x, and go build itself refuses, reporting declared and not used: x. Go is deliberately strict about unused locals, so that class of mistake never even reaches the linter.
The linter and format-on-save are different jobs
In the previous chapter you turned on format-on-save in VS Code, which runs go fmt for you. It is fair to wonder whether the linter is now redundant. It is not, and the two complement each other.
Format-on-save handles layout: indentation, spacing, import order. It makes your code look the same as every other Go file and never changes what the code does. The linter handles correctness and intent: an ignored error, an unused function, a value you assigned and never read. One keeps your code tidy; the other keeps it from being subtly wrong. You want both, and they do not overlap.
The Makefile will grow
Right now the Makefile has six targets, and that is on purpose. It grows alongside the course as new tools earn their place:
A test target arrives in the testing section, once we start writing tests.
A migrate target arrives when we add database migrations for PostgreSQL.
This same make lint gets wired into continuous integration at the end of the course, so the linter runs automatically on every change, not just when you remember to run it.
So if those targets feel missing now, they are simply not needed yet.
What's Next
With your tooling in place, the next section starts the Go language itself, beginning with variables, types, and constants. From here on you can run and lint everything you write with a single short command.