In the last chapter you saw the map of what we are building: a Task API, layer by layer. Before we write any of it, you need a working Go install, a toolchain you can drive from the terminal, and the companion repository on your machine. By the end of this chapter you will run your first Go program and watch it print Hello, Go!.
Go ships as a single installer with the compiler and the whole toolchain inside. There is no separate runtime to manage and no package manager to bootstrap first.
On macOS you have two easy options:
bashbrew install go
On Windows, download the MSI from go.dev/dl; on Linux, follow the tarball instructions on the same page. Any recent version works for this course. The companion repo was built with go1.26.4, and nothing here depends on a feature newer than Go 1.22.
Once it finishes, confirm the install from a terminal:
bashgo version
You should see the version and your platform printed back:

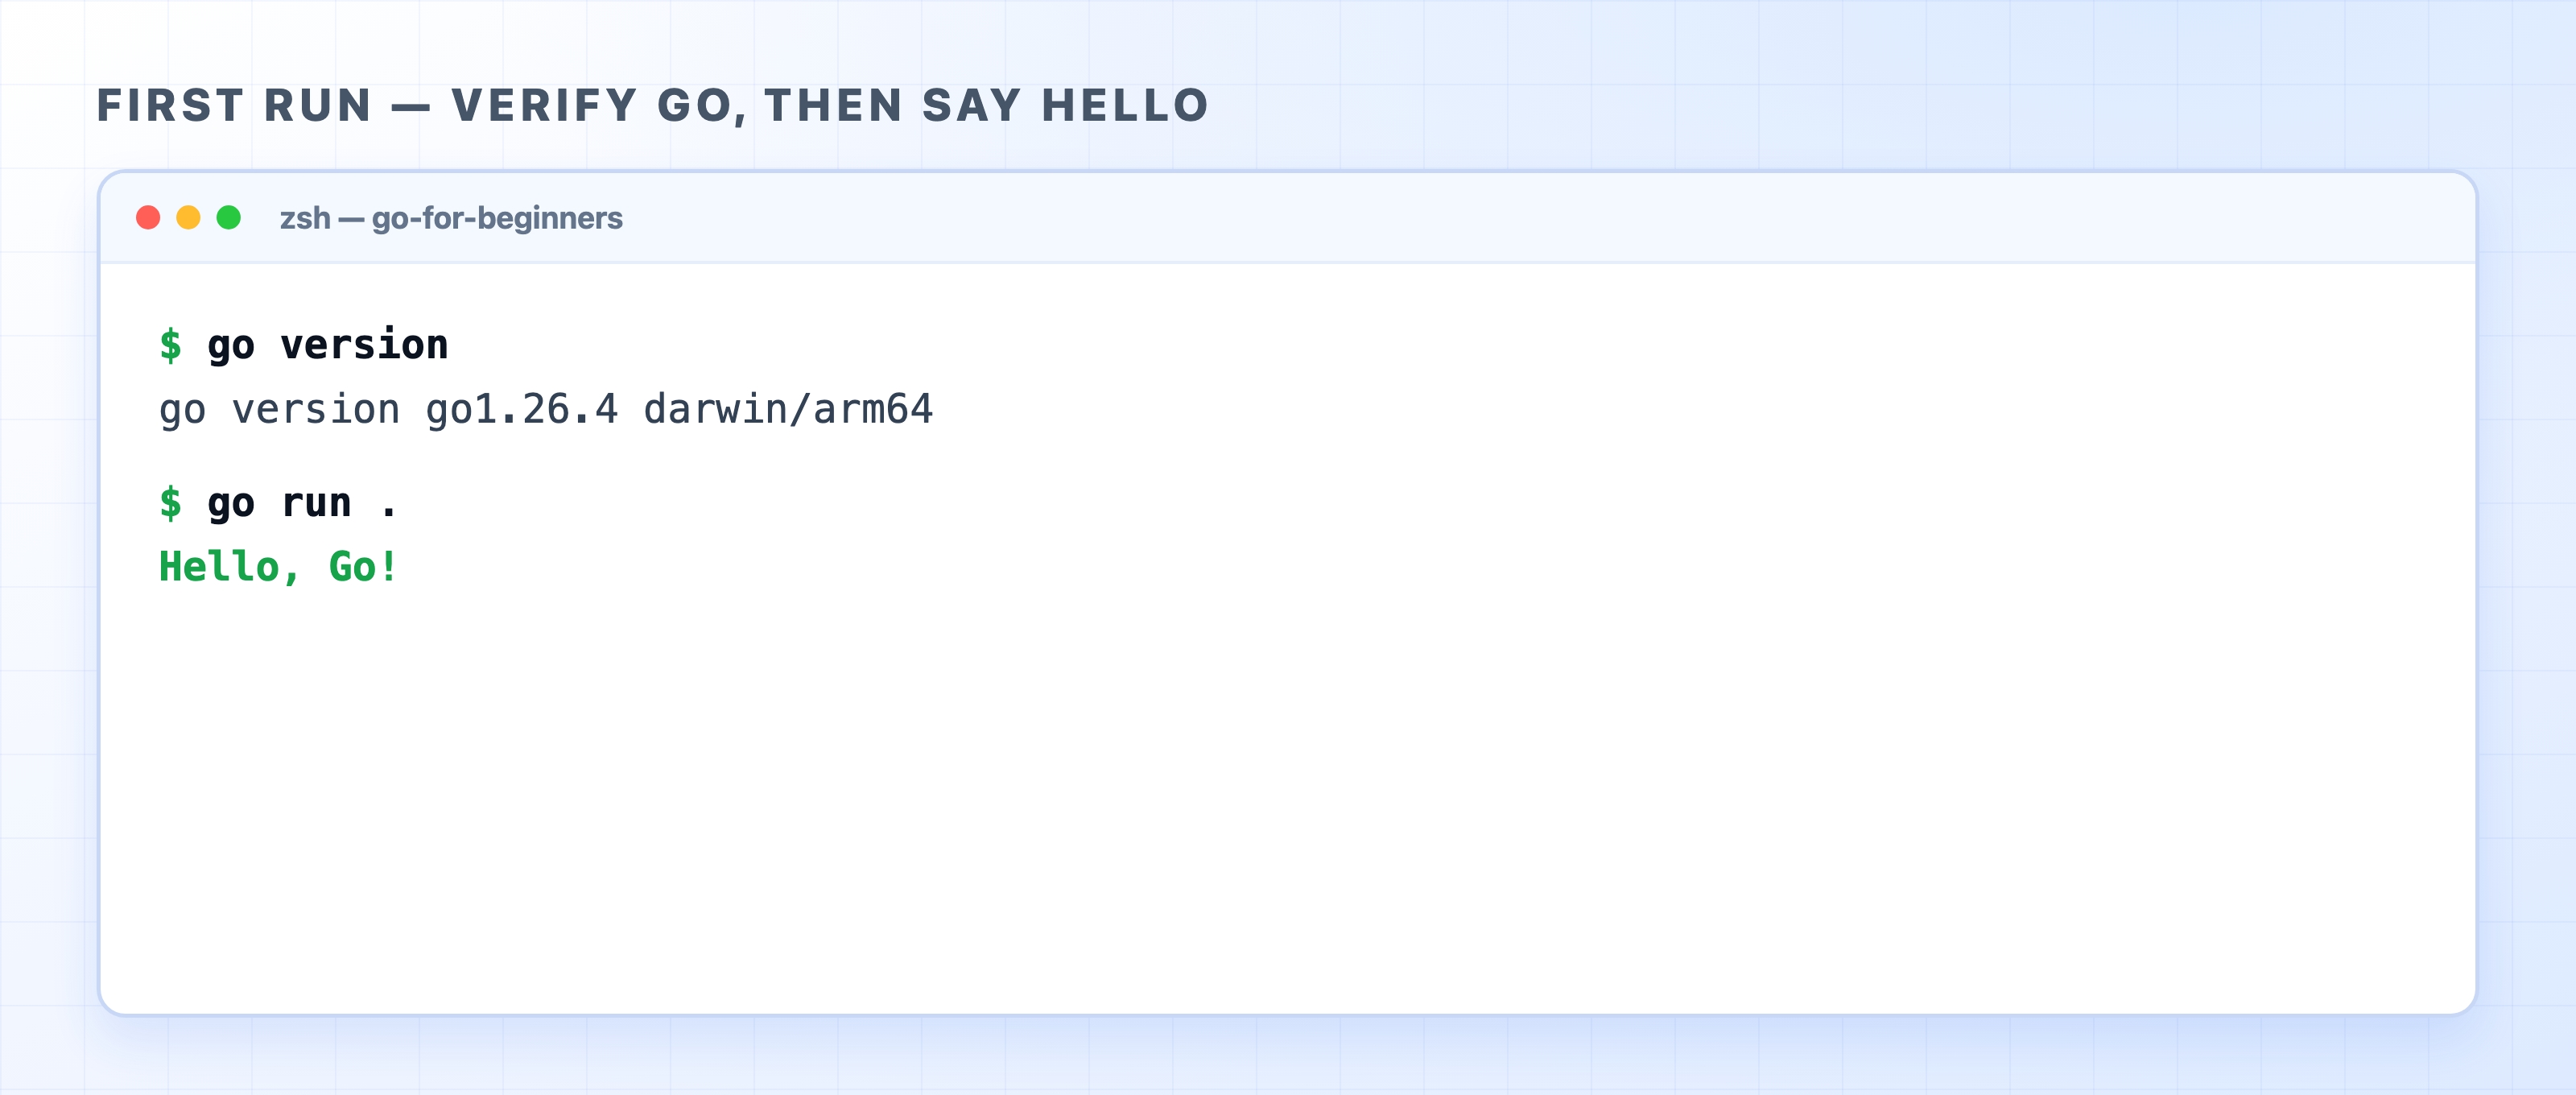
If you get go: command not found instead, the go binary is installed but not on your PATH. Close and reopen your terminal first, since the installer updates your shell config and only a fresh shell picks it up. If the error persists, the Homebrew install puts go on your PATH automatically, while the official package installs to /usr/local/go/bin, which you may need to add yourself.
go is one command with many subcommands. You will lean on a handful of them constantly, so it is worth knowing what each one does before you need it.

go run compiles the current package and runs it in one step. This is what you use while developing, when you just want to see the program execute.go build compiles the package into a standalone binary and stops. You ship the binary; it needs no Go installed on the target machine.go fmt rewrites your code into Go's one canonical style. Go has no formatting debates because everyone runs the same formatter.go vet reports suspicious code the compiler accepts but probably should not, like a Printf format string that does not match its arguments.go test runs your tests. We reach for it once we start testing the API later in the course.go mod manages your module and its dependencies. The first one you will run is go mod init, which we get to below.You do not need to memorize these. Run go help any time to see the full list.
If you have read older Go tutorials, you may have seen GOPATH and a rule that all your code must live in one specific directory. Modern Go does not work that way.
A module is a collection of Go packages with a name and a list of dependencies, tracked in a file called go.mod. You create one with go mod init and pass it a module path, the import name for your code, usually the repository URL where it lives:
bashgo mod init github.com/mt26691/go-for-beginners
That command prints a short confirmation and writes a go.mod file:
textmodule github.com/mt26691/go-for-beginnersgo 1.26.4
Two lines. The module line is the path you just chose, and the go line records the Go version the module targets, which go mod init filled in from the Go you installed. Your project can now live in any folder you like. This is the one piece of project setup you must not skip: run a build command in a directory with no go.mod and Go stops with a "go.mod file not found" error.
You can write Go in any editor, but the best beginner experience is VS Code with the official Go extension. Install the extension, open a .go file, and accept its prompt to install the Go tools. The one that matters is gopls, the official Go language server. It powers autocomplete, jump-to-definition, and red underlines on errors as you type.
Turn on format-on-save so every file is formatted the moment you save it:
json{"editor.formatOnSave": true}
Now go fmt runs for you automatically. You stop thinking about whitespace, and your code matches every other Go project on day one.
Every code chapter in this course has matching code in the companion repo. Clone it once:
bashgit clone https://github.com/mt26691/go-for-beginners.gitcd go-for-beginners
The main branch holds the final, finished service. Each chapter also has two branches so you can follow along from any point:
-start branch: the project as it is when the chapter begins-finish branch: the project as it is when the chapter endsThe naming is the chapter number plus a short name. For this chapter, that is 04-installing-go-start and 04-installing-go-finish. (Chapters 1 to 3 had no code, so the companion code begins here at chapter 4.) To start where this chapter starts, check out the start branch:
bashgit checkout 04-installing-go-start
If you ever get stuck, check out the matching -finish branch to see the completed code.
The start branch gives you a skeleton: a go.mod and a main.go with an empty main function waiting to be filled in.
go// main.gopackage mainfunc main() {// TODO: write your first Go program here.}
Every Go program starts in package main, and func main is the entry point that runs when the program starts. Right now main is empty, so the program compiles and runs but prints nothing. Let us make it say hello. Replace the body so the file reads:
go// main.gopackage mainimport "fmt"func main() {fmt.Println("Hello, Go!")}
fmt is the standard library's formatting package, and fmt.Println prints a line of text. The import "fmt" line brings the package in; Go will not let you import a package you do not use, which is why the import was not there until we needed it.
Run it:
bashgo run .
The terminal figure above shows the result: Hello, Go!. The toolchain works end to end. If you want a standalone binary instead, build one:
bashgo build
go build produces an executable named after the module's last path segment, so here you get a file called go-for-beginners that you can run directly with ./go-for-beginners. The companion repo ignores that binary in .gitignore so a compiled artifact never lands in version control.
If you reached this point, you have the same finished state as the 04-installing-go-finish branch.
Your environment runs Go, but you are still typing each command by hand. Next we wrap these commands in a Makefile and add golangci-lint so you catch mistakes early and run the whole project with one short command.